
How I Made a Beautiful 3D Yarn Lily Embroidery on a Wooden Frame
Nov 27, 2024
There’s something incredibly satisfying about turning simple materials into a work of art. Recently, I came across a craft idea that involved creating 3D flowers using yarn, and I couldn’t resist giving it a try. The result? A gorgeous 3D lily embroidery on a wooden frame that I’m so proud of. Let me walk you through how I made it—step by step.
Materials I Used
A wooden embroidery frame with small holes around the edges.
A piece of grid canvas (I used a plastic one) that fit snugly into the frame.
Yarn in white, green, and yellow.
A large embroidery needle that worked well with yarn.
Small scissors to cut the yarn neatly.
(Optional) A hot glue gun for extra reinforcement.
Step 1: Setting Up the Frame
I started by attaching the grid canvas to the wooden frame. The grid needed to be stretched evenly, so I secured it tightly. This gave me the perfect base to work on.
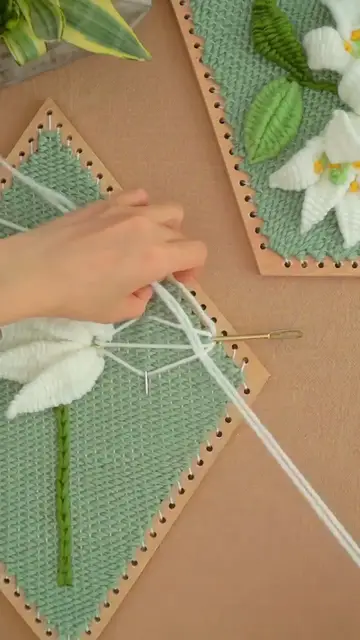
Step 2: Making the Lily Petals
Designing the Petals: I threaded white yarn through my embroidery needle and began creating the petals. Using the grid as a guide, I stitched long, oval shapes by looping the yarn back and forth. I made sure to keep my stitches neat and uniform.
Building Texture: Once I had the basic petal shape, I kept layering the yarn within the same pattern to give the petal a raised, three-dimensional look. The more layers I added, the fuller the petals became.
Repeating for All Petals: I ended up making six petals for my lily. After finishing each one, I tied off the yarn securely on the back to keep everything in place.
Step 3: Creating the Stem and Leaves
Show More Show Less #How-To, DIY & Expert Content