
How I Turned Plain Stones into Adorable Bee, Ladybug, and Fish Designs
Nov 27, 2024
I made these charming, palm-sized decorations step by step.
What You’ll Need
Small, smooth stones (palm-sized works best)
Sign pens or permanent markers in a variety of colors
A black fine-tip marker for outlines and details
Optional: Clear sealant spray to protect the design
Acrylic paint (if you prefer a painted base)
Step 1: Prep Your Stones
Start by selecting stones with smooth surfaces, as they’re easier to work with. I gave mine a quick wash and allowed them to dry completely. If you’d like a bright background, you can paint the stones with white or light-colored acrylic paint and let them dry before proceeding.
Step 2: Choose Your Design
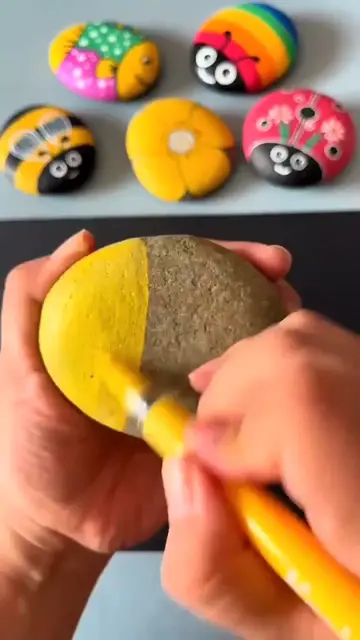
I decided to create a bee, a ladybug, and a fish. Each design is simple yet full of personality:
Bee: I began by coloring the stone yellow with a sign pen. Then, I used the black marker to draw stripes and a cute smiley face. Finally, I added small white wings on top.
Ladybug: For the ladybug, I colored the stone red and used the black marker to add dots and a split line down the center. A little face at the top completed the look.
Fish: For the fish, I chose a blue base and drew colorful scales, fins, and a big, smiling eye. You can mix and match colors to make each fish unique.
Show More Show Less #How-To, DIY & Expert Content