
How to Make a Cute Clay Duck
Dec 6, 2024
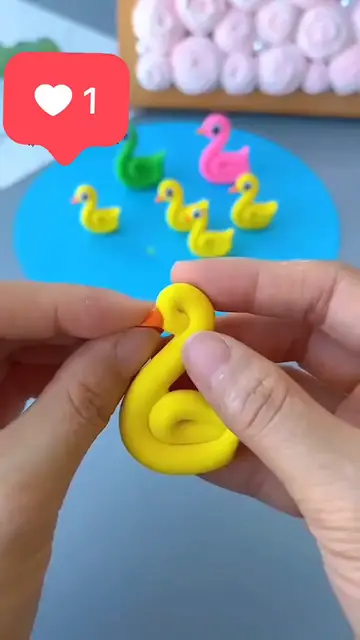
As someone who loves creating adorable miniature crafts, I recently stumbled upon a fun project: making tiny clay ducks. These little creations are perfect for adding a playful touch to your desk, shelf, or even as part of a miniature scenery. Today, I’ll walk you through how I made my own yellow clay duck.
Materials You’ll Need:
Yellow modeling clay
A small tool for shaping (like a toothpick or sculpting tool)
A flat, clean surface to work on
Optional: Black and white clay (for eyes) or a permanent marker
Step 1: Shape the Body
Start by taking a small piece of yellow clay and rolling it into a smooth oval shape. This will form the duck’s body. Flatten one end slightly to make it easier to attach the neck.
Step 2: Craft the Neck
Take another small piece of yellow clay and roll it into a long, thin cylinder. Carefully bend it into an “S” shape to mimic the graceful curve of a duck’s neck. Attach one end to the flattened part of the body, pressing gently to secure it in place.
Step 3: Add the Head
Roll a tiny ball of yellow clay to form the duck’s head. Attach it to the top of the neck, ensuring it’s firmly in place. You can use a sculpting tool or toothpick to blend the neck and head seams for a smoother look.
Step 4: Sculpt the Beak
Show More Show Less #How-To, DIY & Expert Content